I rescued a beautiful 80s wool coat with a torn, stained lining and gave it brand new life with fresh satin lining. The outside was perfect, but the lining? Completely shredded under the arms and stained from years of wear. I almost walked away, but I decided to try relining it myself. It took me a full weekend , but the result is worth it.
Tools & Materials I Used
Seam ripper
Sharp scissors
Lots of pins
New lining fabric (I used slippery satin — about 2-2.5 yards)
Matching thread
Chalk or fabric marker
Iron and pressing cloth
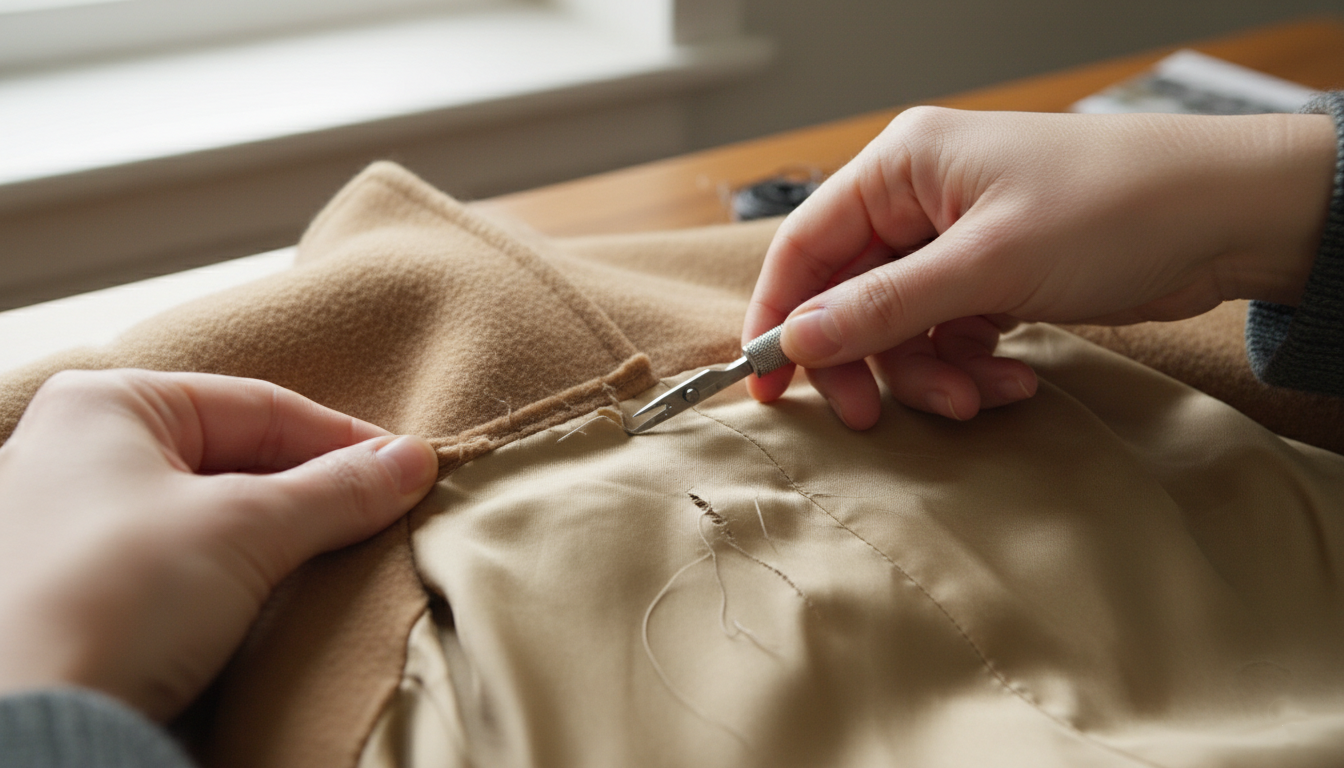
1: Carefully Remove the Old Lining
This was the most tedious part. I spent hours gently seam-ripping the lining from the facing, hem, and sleeves. I took tons of photos and notes because I knew I’d forget how everything was attached.
Pro tip: Don’t rush. I always put a piece of cardboard behind whatever I’m ripping.
Step 2: Use the Old Lining as Your Pattern
I laid the ripped lining pieces flat, pressed them as best as I could, and traced around them onto the new satin. Make sure to add a little extra seam allowance if the old one looks trimmed down.
The back lining usually has a pleat or fold for movement — don’t forget to copy that exactly or your new lining will feel tight.
I messed this up slightly on one sleeve and had to recut it. I don’t know if this makes sense but working with slippery satin while trying to match curves is low-key stressful.
Step 3: Sew the New Lining Together
I sewed the new lining exactly like the old one — shoulder seams, side seams, sleeve seams. Then I attached the sleeves to the body.
Satin is slippery! I used a walking foot and lots of pins. Still, one seam twisted on me and I had to unpick it. Classic.
Step 4: Install the New Lining into the Coat
This is the magic (and scary) part. I pinned the new lining into the coat, right sides together with the facing, then stitched it in. At the hem, I left it loose with a bit of ease so it hangs nicely and doesn’t pull.
For the sleeve hems, I hand-stitched them because machine sewing in a tiny tube is impossible.

The coat feels completely different now — warm, smooth, and luxurious inside. I wore it out yesterday and felt so fancy.
Biggest lessons:
Take photos at every stage. You’ll thank yourself later.
Buy extra lining fabric. Better safe than short.
Hand-stitching the final bits gives a much cleaner finish than forcing it on the machine.
Vintage coats often have hand-finishing, so embrace some hand sewing.
It wasn’t perfect , but I saved a beautiful coat and learned a ton.And most importantly, I love this "new" piece of clothing of mine!