Sew your first shirt or dress using indie patterns and smart measurement hacks to get a fit that actually works.
Sewing your first garment can feel intimidating, especially when you're used to fighting off-the-rack sizing that never quite sits right. But with the right measurements and a beginner-friendly pattern, you can make a shirt or dress that fits your body perfectly. I've spent years upcycling vintage finds and moderating community swaps, and I can tell you: if you can measure and print a PDF, you can sew this. My first attempt had a sleeve that looked like a potato sack, but the second one clicked. Here's how to get to the good part without the stress.
What You Need
- Sewing Essentials Kit: Includes the basics you'll need to start.
- Measuring Tape: Essential for accuracy; usually included in the kit.
- Fiskars Tools: Sarah Hearts partners with Fiskars, a lifelong favorite for DIY, so grab their scissors or tools if you can.
- Thread: Get a spool that matches your fabric color.
- Printer & Ruler: Required for digital patterns.
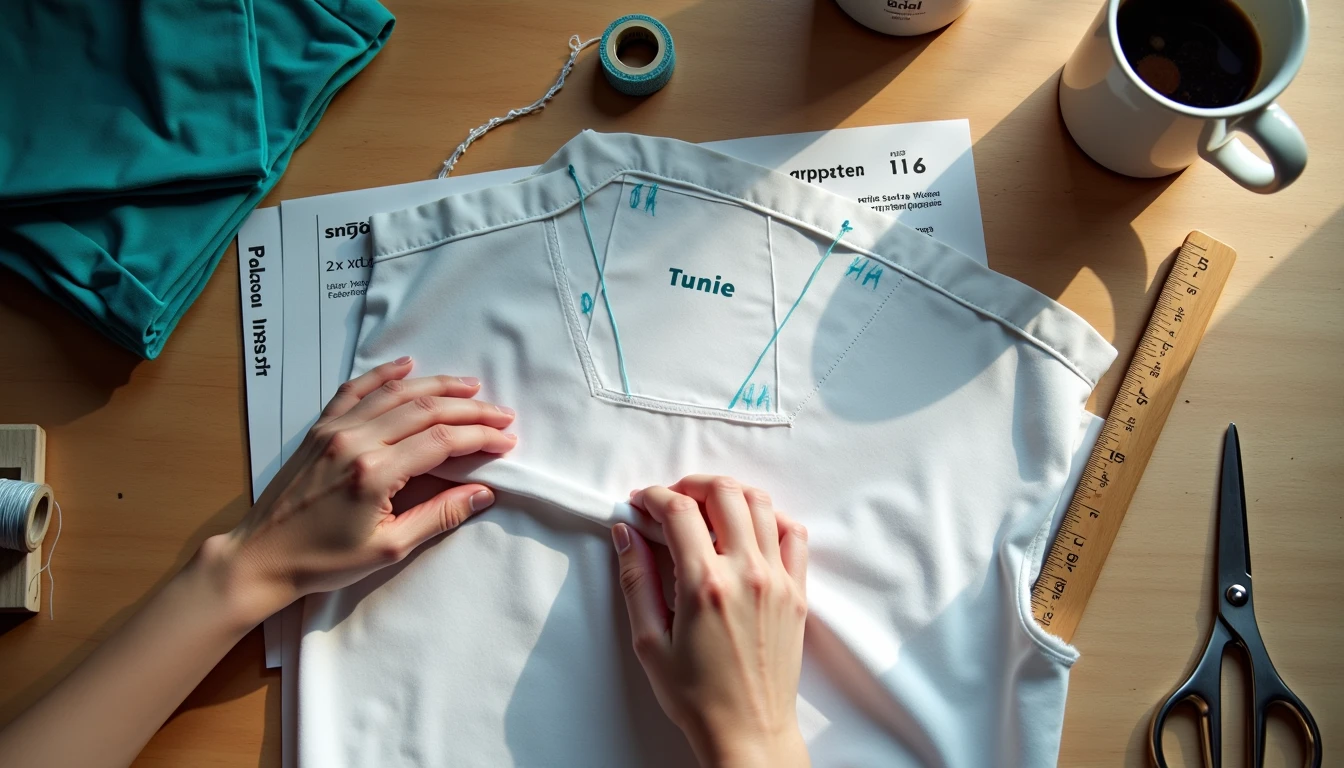
- Pattern: I recommend the Stevie Tunic by Tilly and the Buttons. It's a wonderful beginner pattern. Other great indie designers include Made by Rae, Sew Liberated, Megan Nielsen, Deer & Doe, Grainline Studio, Hey June Handmade, and Helen's Closet.
- Fabric: Choose something stable for your first try, like a cotton poplin or linen blend.
*Mei's note:* If you don't have a full kit, a basic measuring tape and sharp scissors will get you started. My first project used borrowed pins and a thrifted tape measure. You don't need expensive gear to begin, and my grandmother's Singer 4423 handled everything with just a fresh needle.
How To Do It
1. Take Your Measurements: Bodies change, so measure yourself before every project. Wear underwear or yoga tights. Use your measuring tape to find the fullest part of your bust, your natural waist (bend to the side to find the crease), and the fullest part of your hips. Why measure frequently? Because a garment cut to last year's measurements might not fit today.
2. Select Your Pattern Size: Pattern sizes are not store sizes. Always choose based on your actual measurements. If you are pear-shaped, you might need a smaller size on top compared to your hips. If you fall between sizes, search for videos on "grading between pattern sizes" to blend sizes smoothly.
3. Choose Your Pattern: Indie designers are fantastic for beginners because they often include wonderful step-by-step directions. The Stevie Tunic is a blank canvas that works as-is or for hacking. Why indie? They often update their PDFs and have active communities, which helps when you get stuck.
4. Print the Pattern: Digital patterns save money and arrive instantly. If you print at home, set your printer to 100% scale. Never use "fit to page." Why 100%? Printers often add margins or scale for paper size, which distorts the pattern.
5. Verify Scale: Print only the first page first. Use your ruler to measure the test square on the page. It is often a 2" x 2" square. Double-check that the measurement matches exactly. If it does, print the rest.
6. Assemble: Trim the bottom and right side of each page and tape them together according to the pattern instructions.
Where It Goes Wrong
- The "Fit to Page" Trap: If your printer defaults to shrinking the PDF, your pattern pieces will be too small. Sign you're off-track: The test square measures less than 2 inches. Recovery: Stop printing immediately. Change settings to 100% or "actual size" and re-print the test page.
- Ignoring Body Shape: Picking a size based on your jeans size will result in a garment that pulls or gaps. Recovery: Measure yourself again and grade between sizes. It's normal to be different sizes for bust and hips.
- Skipping the Waist Check: If you don't bend to the side to find your natural waist, your waistline notch might end up in the wrong place. Recovery: Mark your natural waist with a string or elastic band before measuring to ensure the pattern aligns with your body.
Pro Tips
- Hack the Stevie Tunic: Since the Stevie is a blank canvas, you can modify it easily. For a peplum-style top, cut the bodice pattern at the waist notch and add a gathered skirt.
- Dress Conversion: To turn the tunic into a dress, add a gathered skirt that is 1.5 times your hip measurement. Replace the cuffed sleeves with short gathered sleeves for a fresh look.
- Digital vs. Pre-Printed: Pre-printed patterns come in a fancy envelope with the full size range, but they cost more and take time to ship. Digital patterns are cheaper and faster if you have a printer. I always opt for digital to save a couple of bucks and start immediately.
- Test Square is King: I once printed a full pattern without checking the square, and the whole thing was 10% too small. The test page takes 30 seconds and saves hours of cutting errors.
Bottom Line
- When to Attempt: This is perfect for a weekend project if you have basic machine skills. The Stevie Tunic is approachable for true beginners.
- When to Take to a Tailor: If you are unsure about grading between sizes, look for video tutorials first; you can likely do this yourself. Tailoring is only needed if you lack a sewing machine or time.
- Cost vs. Payoff: Digital patterns save money upfront. A self-made garment that fits your exact body type is priceless compared to endless returns.
- Real Talk: Your first garment might have a wonky seam, and that's okay. Sewing is a skill that improves with every project. If your first attempt looks rough, that's normal — the second one is where it clicks. Keep your fabric scraps, adjust your tension, and try again. You've got this.