My full beginner-to-intermediate tutorial on turning old jeans into perfectly worn, distressed denim.
Quick summary: Step-by-step guide to distressing old jeans with sandpaper, scissors, and patience. Includes all my biggest rookie mistakes so yours turn out better.
Tools You’ll Actually Need
Sharp fabric scissors or thread snips
80-120 grit sandpaper (or a cheese grater for aggressive distressing)
Tweezers (the bigger the better)
Seam ripper
Chalk or white pencil
Old towel or cardboard (to put inside the leg)
Washing machine (for final fraying)
That’s it. No fancy kit required.
Step 1: Pick the Right Jeans & Plan Your Holes
Start with 100% cotton or mostly cotton jeans that already have some wear. Stretchy ones fight back more. I like men’s straight-leg jeans because they’re usually thicker and cheaper at thrift stores.
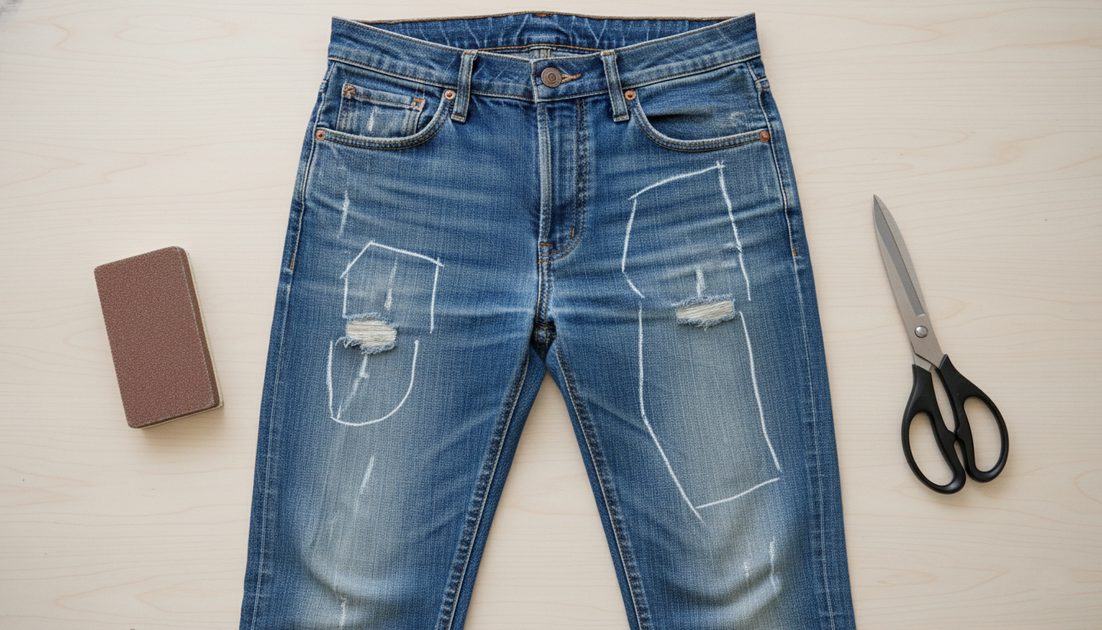
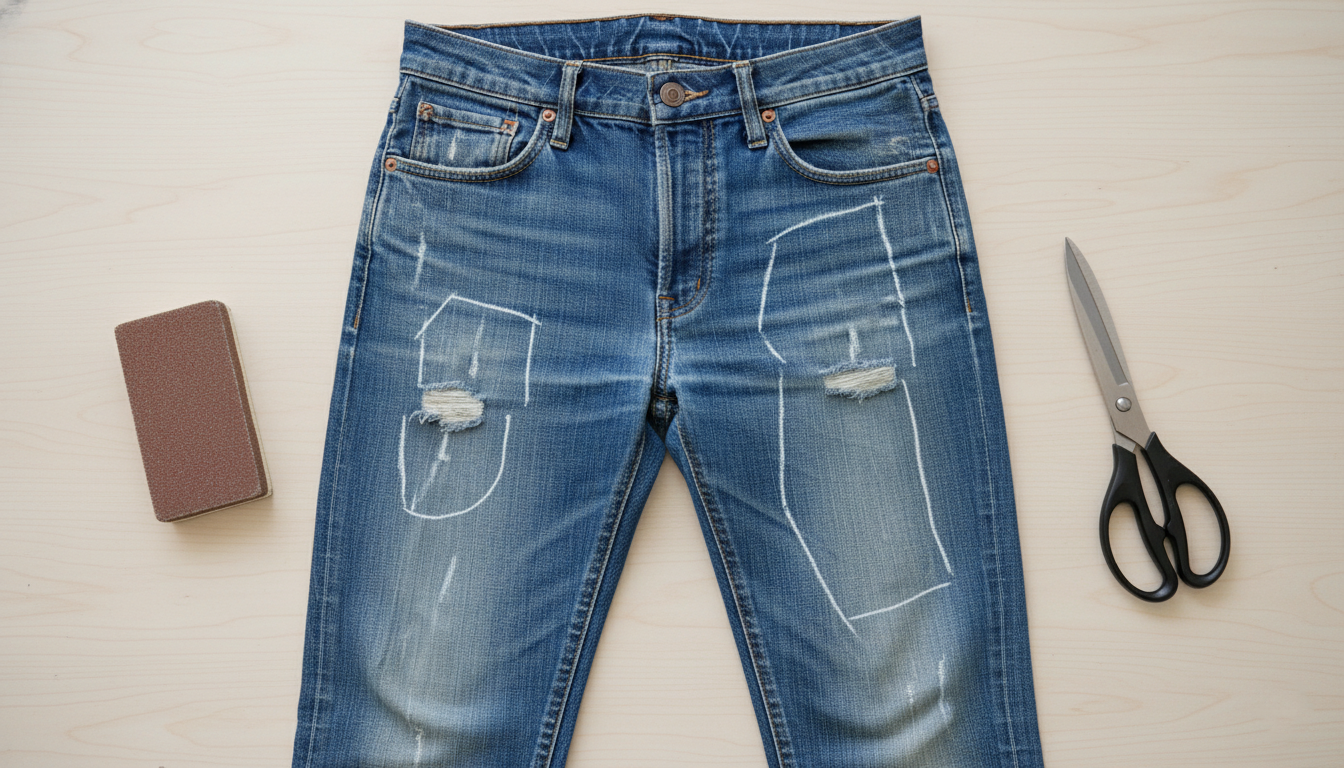
Decide where you want the distress. Knees, thighs, and back pockets are classic. I draw light chalk marks first. Last time I got excited and cut without planning — ended up with a huge hole way too high on the thigh. Learned my lesson.
Step 2: Sanding for Natural Fading (The Safe Start)
Put cardboard inside the leg so you don’t sand through the back. Rub the sandpaper back and forth over the areas you want to fade. This breaks the blue dye and exposes white threads.
Go slow. I once sanded one spot like crazy and created a super thin patch that ripped completely in the wash. Now I check every few minutes by rubbing with my finger.
This step alone can give you that soft vintage look without any actual holes.
Step 3: Cutting & Thread Pulling (The Fun Part)
When you’re happy with the faded area, make small horizontal cuts with scissors — start tiny! Then use tweezers to gently pull out the blue horizontal threads. The white vertical threads stay and create that classic distressed look.
This is where most people go wrong. I used to pull too aggressively and the whole thing unraveled into a giant mess. Now I pull just a few threads at a time and stop often to look at it.
Step 4: Making Bigger Holes & Reinforcing
For bigger knee holes, cut a larger rectangle, then fray the edges heavily. I like to leave some vertical threads hanging for that “I actually wore these out” effect.
Pro tip I learned the hard way: put a few stitches at the corners of big holes with matching thread!
It stops them from turning into giant tears after washing. I didn’t do this on my first pair and the hole grew from cute to “my whole knee is out” after one wear.
Step 5: Washing & Finishing
Throw them in the washing machine on normal cycle. The agitation does beautiful fraying for you. I sometimes add a little bleach in a spray bottle for extra fading, but test first — I once turned a whole leg patchy yellow by being too generous.
Dry them normally or hang dry if you want less fray.

What I’ve Learned After Ruining Pairs
Always distress a little less than you think you want. Washing adds a lot more.
Darker jeans show distressing more dramatically than light ones.
The cheese grater technique works great for super rough edges but can look messy fast — use it sparingly.
If you go too far, you can patch behind the hole with scrap denim for a cool repair look.
This whole process usually takes me 1-2 hours per pair plus washing time. Cost? Almost zero if you start with $5 thrift jeans.


No notes yet — write the first one.