If you've ever thrifted a bomber or varsity piece with stretched cuffs, you've already met one of the most useful parts of a jacket: types of ribbing on jackets. Ribbing is the stretchy trim at the collar, cuffs, and hem that helps a jacket hold shape, seal out wind, and feel finished. When it is in good shape, the whole garment looks sharper. When it is tired, the jacket can still be worth saving.
Common types of ribbing on jackets to look for
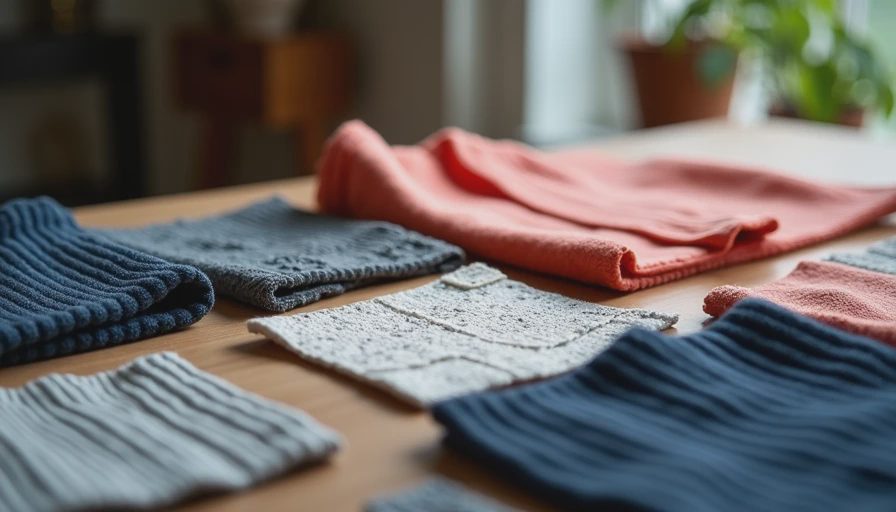
The most common knit structure is 1x1 rib, which means the fabric alternates knit and purl columns in a way that gives it spring and recovery. It usually looks neat and narrow, which is why you see it on cuffs and collars. 2x2 rib is a little wider and beefier, so it can feel thicker and more casual. Both can be cotton, cotton-poly, acrylic, wool, or a blend with a little spandex for extra stretch.
You will also run into different looks, even when the knit structure is similar. Varsity jackets often use striped ribbing in school colors. Bomber jackets usually lean on solid waistband and cuff ribbing that is dense enough to hold the silhouette. Fashion jackets may use softer rib knit bindings or a slightly shiny synthetic rib that matches the shell fabric. If you are buying secondhand, pay attention to the stretch and the recovery more than the label. A good cuff should bounce back after you tug it gently.
The easiest mistake for a beginner is assuming all rib trim is interchangeable. It is not. A heavy wool-blend rib will look bulky on a lightweight nylon shell, and a thin fashion rib can look flimsy on a lined work jacket. Matching thickness matters because the trim has to support the jacket opening without warping it.
Why the ribbing changes fit, comfort, and warmth
Rib trim does more than decorate the edge. It controls how the jacket sits on the body. A firm cuff keeps sleeves from sliding over your hands. A snug hem helps trap warmth at the waist. A well-made collar closes the gap around the neck so the jacket feels less drafty. That is why a tired edge can make an otherwise great thrift find feel sloppy or cold.
When the rib stretches out, the jacket can start to puddle at the wrists or flare at the hem. You will often see this on pieces that were worn hard, stored wrong, or washed and dried on a rough cycle. Sometimes the shell still looks excellent, which is a nice reminder that the trim is often the weakest part. No such thing as a stupid question here — let's walk through it. If the outer fabric is strong, the edge treatment may be the only thing standing between a pass and a purchase.
Another thing to notice is recovery. Good ribbing stretches, then snaps back without staying baggy. That recovery is what keeps a bomber cuff from looking limp after one wear. If the edge stays wavy or the stitches are popping, the jacket may need repair, but that does not automatically make it a bad buy. It just means you should price the project accordingly and decide whether the fix is worth your time.
What to inspect when you buy a thrifted jacket
When I compare types of ribbing on jackets at the thrift store, I start with a simple stretch test. I hold the cuff at both ends, pull gently, and watch how fast it returns. If it rebounds quickly, that is a good sign. If it feels thin, shiny, or oddly loose, the fibers may be tired. I also check for pilling, holes at the seam line, and color fade where the cuff or hem rubs against bags, belts, and chair backs.
Look closely at the seam where the ribbing meets the body. That join tells you a lot. If the stitching is broken, the edge may have separated because the rib lost stability. If the seam is still strong but the trim is relaxed, you may only need a replacement band or a careful restitch. I also turn the jacket inside out to see whether the seam allowance was finished neatly. A clean interior usually means the maker cared about durability, which is a nice clue on older pieces.
Price matters here too. A thrift jacket with tired trim can still be a bargain if the shell is clean and the zipper works. I would rather pay $12 for a jacket that needs cuff replacement than $40 for a trendy piece with a flawless sleeve edge but a damaged body fabric. When you shop with that mindset, you stop treating ribbing like a minor detail and start seeing it as a repairable part of the cost.
How to repair loose cuffs and a sagging hem
The right fix depends on how the types of ribbing on jackets were attached in the first place. If the rib is only stretched out, steam can help it relax. Lay a pressing cloth over the edge, use a low-to-medium iron setting, and press lightly instead of dragging the iron around. If the fabric is distorted but still healthy, a little heat and careful reshaping may bring back the line.
If the rib is truly dead, replacement is the cleaner route. Measure the opening, then cut a new rib band with negative ease so it is slightly smaller than the opening and can pull back into shape. A good starting point is 10 to 15 percent smaller, though thick fabrics sometimes need a little more. Sew with a stretch stitch, lightning stitch, or serger so the seam can move with the fabric. If you only have a regular machine, a narrow zigzag can work in a pinch.
The part beginners often miss is grain direction. Rib knit should stretch across the width, not along the length. If you cut it the wrong way, the cuff will fight you from the moment you sew it on. That is one of those mistakes I have made myself, and the fix was simple: recut the band, test the stretch, and baste before committing to the final seam.

Best tools and replacement materials for a clean result
You do not need a fancy setup to handle a basic jacket repair. A sharp seam ripper, pins or clips, washable marker, and measuring tape cover most of the prep work. For sewing, a stretch or ballpoint needle helps reduce skipped stitches on knit trim. If your machine likes to chew delicate fabrics, a walking foot can keep layers moving evenly. A small pressing cloth is worth having too, because ribbing can scorch faster than the shell fabric.
For replacement material, look for rib knit by the yard at fabric shops, or buy pre-cut cuff and waistband ribbing when the color match is close enough. Black, navy, gray, and cream are the easiest rescue colors because they blend with a lot of vintage shells. If you want an exact match, shop with the jacket in hand or bring a swatch photo taken in daylight. That little step saves a lot of disappointment later.
I also like to keep wooly nylon or polyester thread on hand for stretchy hems. It is not mandatory, but it gives a softer seam on some jackets. If the project is just a temporary fix, fusible web can hold a loose edge long enough for you to test the fit before you do a full replacement.
When to repair, replace, or leave the jacket alone
Some types of ribbing on jackets are so worn that a repair makes sense only if the rest of the jacket is excellent. If the shell is damaged, the zipper is failing, and the lining is torn, that is a lot to take on for one piece. On the other hand, if the body is solid and only the cuffs are limp, the project is often a smart save. That is the sweet spot for upcycling: small work, big payoff.
A good rule is to repair when the jacket already earns a place in your closet. Replace when the edge is dragging down an otherwise strong garment. Leave it alone when the fabric is too fragile, the fit is off, or the trim is so mismatched that a fix would look awkward. That is not failure; it is just a way to protect your time and materials.
If you are new to this, start with one thrifted jacket and treat it like a practice run. Use it to test stretch, seam ripping, and band replacement before you touch a better piece. Once you know how the trim behaves, buying and mending vintage jackets gets a lot less intimidating. And honestly, that is where the fun starts.




No notes yet — write the first one.