Mend denim holes yourself and save the original fade for under fifteen dollars
Mending a denim hole smaller than a quarter takes forty minutes and keeps your favorite pair out of the donation bin. Running Stitch & Swap Talk for years, I’ve watched beginners freeze at the word darning, but the technique is just structured weaving. Like my grandmother’s approach to mending, patience beats speed, and you rebuild missing threads with a grid of stitches that holds up to daily wear. Professional services use a vintage darning machine and charge from $15.00, so doing it at home saves money and gives you full control over thread color matching.
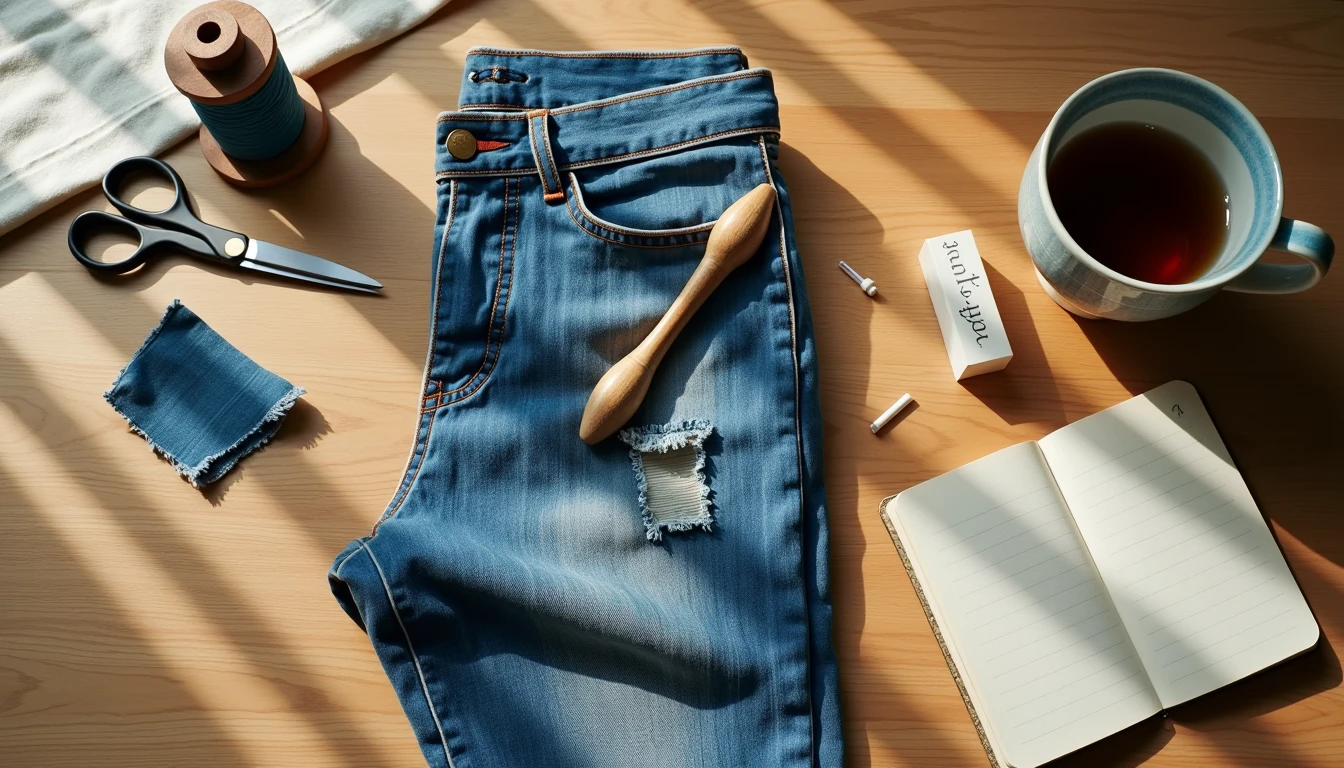
What You Need
- Sewing machine or hand-sewing needle
- Curved form to hold fabric taut
- Denim thread or cotton all-purpose thread
- Sharp fabric scissors
- Fabric chalk or tailor’s chalk
- Iron and ironing board
- Time: 40–90 minutes depending on hole size
- Skill level: Beginner
- Cost reference: Professional repairs using a vintage darning machine start at $15.00, making DIY a low-cost alternative.
How To Do It
1. Turn the jeans inside out and slide the curved form under the hole. The surface pulls the fabric taut so stitches sit flat instead of bunching.
2. Trim loose threads around the tear. Do not cut the denim itself—just clean up frayed edges so they do not poke through later.
3. Pin a lightweight cotton or denim patch behind the hole if it is larger than a quarter. This gives your stitches something to grip instead of pulling through empty space.
4. Thread your machine or needle with a color that matches your jeans. If you want a contrast mend, pick a thread that complements the indigo instead of hiding the repair.
5. Stitch a grid of straight lines over the hole, moving horizontally then vertically. Keep your stitches close together but leave a tiny gap between rows so the fabric stays flexible. This is basic darning (a weaving technique that rebuilds lost threads).
6. Go over the grid two or three times, rotating the fabric slightly each pass. Multiple thin layers build strength without making a stiff, uncomfortable lump.
7. Tie off or backstitch to secure the thread. Trim excess, press the area from the inside with a warm iron, and turn the jeans right-side out.
Where It Goes Wrong
- The mend pulls tight and creates a pucker. This happens when the fabric is not held taut over the form or when stitches are too long. Slide the form back in, gently stretch the fabric sideways, and take shorter stitches on your next pass.
- Thread breaks or shreds through the denim. Denim is heavy, and standard polyester thread can snap under tension. Switch to a heavier cotton or denim-specific thread, and lower your machine tension by one or two clicks.
- The patch shows through or feels scratchy. If you used a thick scrap, the repair will sit stiffly. Swap it for a thinner cotton shirting or pre-washed denim, and always press the seam allowances flat before stitching.
- First attempt the weave looked uneven because I rushed the grid spacing. I unpicked the top layer, repositioned the curved form, and stitched slower. The second pass clicked into place, and the jeans now wear like new.
Pro Tips
- If you do not have a curved form, a smooth wooden egg or a clean glass jar works as a temporary substitute. Just make sure the curve matches the hole’s shape.
- Hand darning gives you more control over tension, especially on vintage or thin denim. Use a running stitch for the base grid and a whip stitch to secure the edges.
- Wash the jeans once before mending. Pre-washing removes factory sizing and lets you see how the fabric shrinks, so your stitches will not pucker after the first laundry cycle.
- Match your thread to the weft (crosswise) yarns instead of the warp (lengthwise) indigo. The weft is usually lighter and blends better into worn areas.
Bottom Line
Attempt this when the hole is smaller than a quarter or when a larger tear still has intact edges around it. If the denim is completely shredded, heavily faded, or located on a high-stress seam like the crotch gusset, take it to a professional. Services that use a vintage darning machine start at $15.00 and can rebuild structure that home machines struggle with. For everyday knee blowouts or thigh scuffs, DIY darning takes under an hour, costs pennies in thread, and keeps your favorite pair in rotation for years. If your first attempt looks rough, that is normal—the second one is where it clicks.