Embroidered flowers are one of the easiest ways to give a thrifted top, skirt, or jacket a second life. If you've ever held a plain denim shirt and wondered how to make it feel special without covering it in patches, this is a great place to start. No such thing as a stupid question here — let's walk through it. The trick is to choose the right base fabric, keep the design small enough for the garment, and test your stitch plan on a scrap first. A few dollars in floss, a hoop, and stabilizer can turn a $6 thrift-store find into something you actually reach for.
Choosing embroidered flowers for the garment you already own
Start with fabric that can handle a little handling. Cotton button-downs, denim jackets, canvas totes, corduroy skirts, and sturdy twill are friendly choices because the fibers hold stitches without fighting back. If the piece is thin, stretchy, or loosely woven, keep the design smaller and lighter. A single daisy on a pocket or a tiny cluster near a cuff is usually safer than a full chest panel. That is especially true on tees and ribbed knits, where the fabric can stretch and make hand stitching look wavy.
Think about where the garment already has visual weight. A collar point, pocket corner, shoulder yoke, or hem can carry detail without making the piece feel busy. For beginners, a motif built from lazy daisies, French knots, and a stem stitch outline is forgiving and still looks polished. I like to sketch the placement in chalk first, then hold the garment at arm's length to check balance. If the flower placement feels too centered or too low, move it before you sew; moving chalk is a lot easier than unpicking thread.
Preparing the fabric so the stitches stay flat
Wash and press the garment before you do anything else. Thrifted clothes can hide sizing spray, body oils, and old detergent residue, and all of that affects how the needle moves. Once the piece is clean, mark the design with a water-soluble pen or tailor's chalk, then slip a piece of tear-away or lightweight cut-away stabilizer behind the area. A simple embroidery hoop, usually around $5 to $15, helps keep the fabric taut without stretching it. You want firm, not drum-tight.
If the fabric is very light, add a small backing patch of muslin or lightweight cotton interfacing before you stitch. That extra layer stops puckering and gives your thread something to bite into. For a vintage blouse or a thin rayon top, I would keep the design tiny and maybe stop at one or two blooms rather than trying to fill the whole panel. If you are using iron-on motif paper or tracing a pattern from a book, test the transfer on a scrap first so the lines do not bleed or leave a shiny mark.
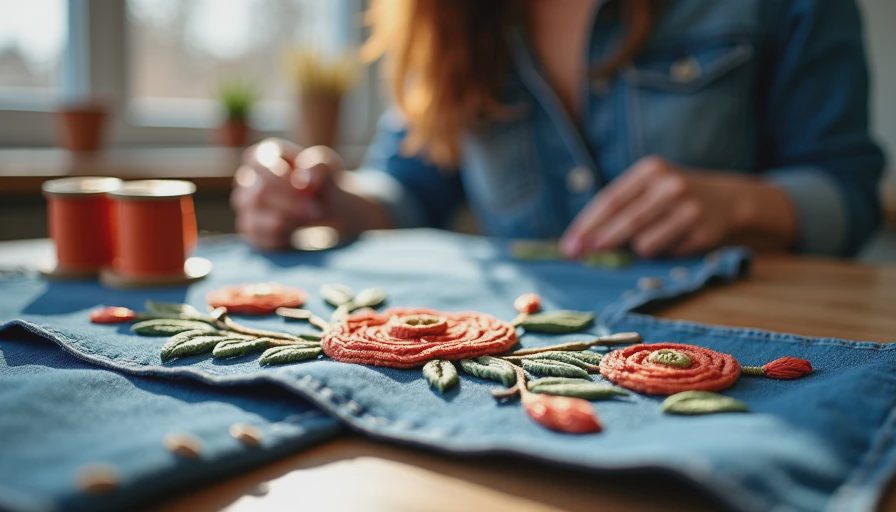
Adding embroidered flowers by hand or machine
For most beginners, hand work is the calmer route. Thread two strands of cotton floss through a size 7 or 9 embroidery needle, knot the end, and build the flower petal by petal. DMC floss is easy to find, and a skein usually costs about $1 to $2, so you can test colors without blowing your budget. Bohin and John James needles are solid picks if you want a needle that does not feel flimsy in the hand. Keep your stitches short on curves and longer on stems so the shape reads cleanly.
Machine stitching works too, but it asks for more control. A basic Brother, Janome, or Singer machine with a free-motion foot can handle simple floral outlines if you practice on denim or canvas scraps first. Lower the speed, use a matching top thread, and check your tension before you touch the real garment. The main goal is not perfect speed; it is an even stitch that does not tunnel the fabric. If you only have a regular sewing machine, you can still build a floral look with satin-stitch petals, straight-stitch leaves, or small zigzag fills.
Fixing mistakes before they become a bigger problem
Here is what went wrong on one of my own thrifted cardigans: I stitched too close to the neckline, and the fabric puckered the moment I tightened the thread. The fix was simple, but it took patience. I removed the backing, pressed the area from the wrong side with a cloth, then re-stabilized it with a fresh piece of fusible interfacing. A small mistake under embroidered flowers is easier to live with than a perfect stitch that never gets worn, so do not panic if the first pass looks rough.
Loose loops usually mean the needle is too dull, the thread is too long, or the tension needs adjustment. Crooked placement can often be saved with leaves, a stem, or a second bloom that makes the first one look intentional. If a stitch line wanders, do not rip the whole thing out unless it really bothers you. Sometimes a slightly imperfect petal gives the piece the thrifted, handmade feel people actually love. If you are unsure, stop, step back, and compare it with a photo from across the room before deciding whether to keep going.
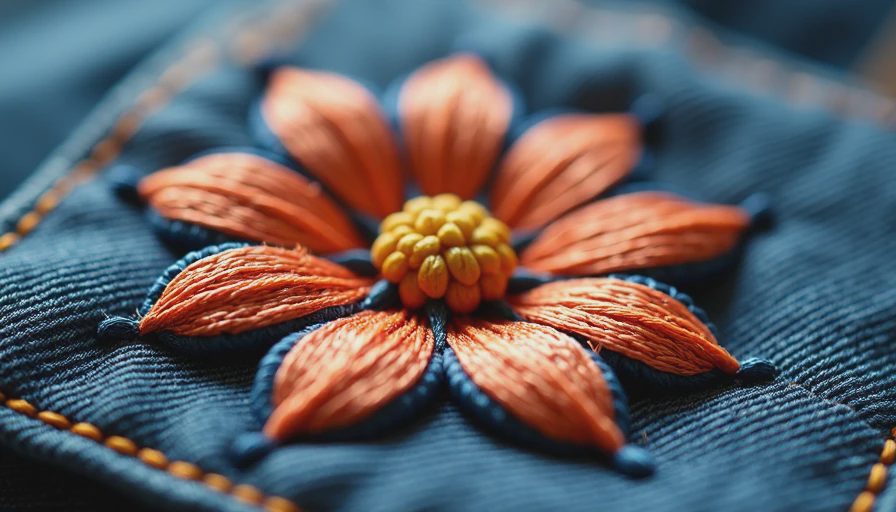
Caring for the finished piece so it keeps its shape
Once the stitching is done, let the garment rest flat for a few hours before you wear or wash it. Then turn it inside out, use cold water, and choose a gentle cycle or hand wash if the fabric is delicate. A mesh laundry bag helps protect raised stitches from snagging on zippers and hooks. Skip the high dryer heat if you can; air drying keeps both the fabric and the thread looking better over time. When you press it, use the wrong side first and a pressing cloth if the thread is prone to flattening.
If you plan to swap, sell, or gift the piece, take a few process photos. Buyers and friends tend to appreciate seeing the before and after, especially when the garment started as something ordinary from a thrift rack. A small floral detail can make a jacket feel more custom and more loved, which is why this kind of upcycling works so well on secondhand finds. If embroidered flowers fit your style, keep the rest of the outfit simple and let the stitching do the work.



No notes yet — write the first one.