Paper mache using flour is one of those wonderfully low-cost crafts that turns scrap paper, water, and a few household supplies into something sturdy and useful. If you have never tried it, no such thing as a stupid question here — let's walk through it. This guide covers the paste recipe, paper choices, layering, drying, painting, and the small mistakes that can make a project lumpy or fragile.
What you need before starting
For paper mache using flour, gather all-purpose flour, water, torn newspaper or plain paper, a mixing bowl, a spoon or whisk, and a covered work surface. A tablespoon of salt is optional but useful if you want the paste to keep a little longer in the refrigerator. You can also use a small amount of white school glue for a tougher finish, although the basic flour paste works well for many masks, bowls, ornaments, and decorative forms.
Use newspaper for the main layers because it is thin, flexible, and easy to tear. Avoid glossy magazine pages at the start; their coating does not absorb paste as evenly. Plain printer paper is stronger but can create ridges if you use too much at once. For a beginner project, a balloon, cardboard shape, or thrifted plastic bowl covered with plastic wrap makes a simple form.
Paper mache using flour is messy, so protect your table with a reusable silicone mat, wax paper, or a cut-open grocery bag. Keep a damp cloth nearby. Paste dries hard on surfaces, but wiping spills while they are fresh saves you from scraping later.

How to mix paper mache using flour paste
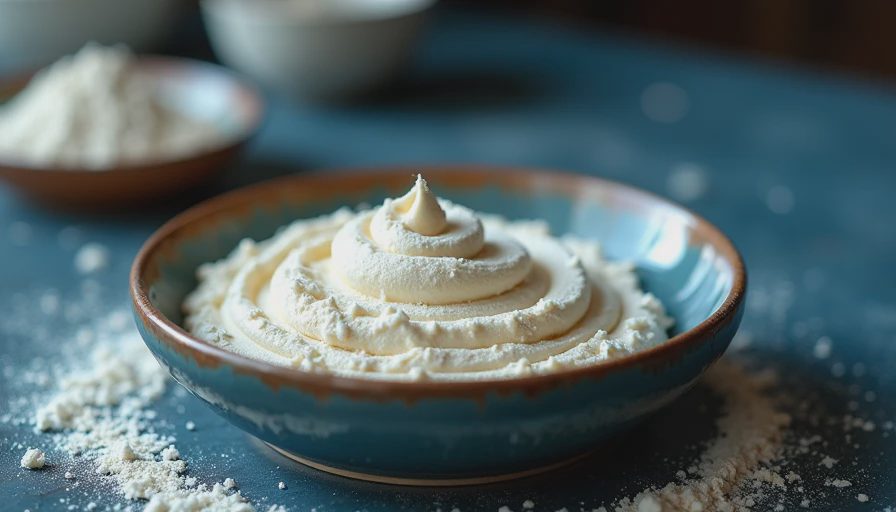
The easiest ratio is one part flour to two parts water. For a small project, start with one cup of flour and two cups of water. Add the water gradually while whisking so the mixture stays smooth. The finished paste should resemble thin pancake batter: fluid enough to soak into paper, but not so watery that it slides off immediately.
If you see lumps, pour the mixture through a kitchen strainer or blend it briefly with a hand whisk. A tablespoon of salt can help discourage spoilage, but it does not make the mixture permanently shelf-stable. Store leftover paste in a sealed container in the refrigerator and use it within a day or two. If it smells sour, shows mold, or changes color, discard it instead of trying to rescue it.
Some crafters use hot water, but boiling water is not necessary. Room-temperature water gives you more control and reduces the chance of cooking the flour into stubborn clumps. Make only what you need. Fresh paste spreads more cleanly than an old batch that has thickened overnight.
Building clean, strong layers
Tear paper into strips instead of cutting it with scissors. Torn edges blend together more naturally and reduce visible seams. Strips around one inch wide and four to six inches long work for most curved surfaces. Dip one strip into the paste, slide it between two fingers to remove excess, and place it across the form.
For paper mache using flour, alternate the direction of each layer. Place the first strips vertically, the next horizontally, and the next at an angle. This crisscross pattern distributes strength instead of leaving one weak line running through the project. Smooth every strip with your fingertips, but do not press so hard that you pull paper away from the form.
Three or four layers are usually enough for a small mask or ornament. A bowl, pinata-style shape, or larger sculpture may need five or six thin layers. Thin layers dry more reliably than two thick, soggy layers. Leave the piece until the surface feels firm before adding another layer; rushing is one of the fastest ways to trap moisture.
Here's what went wrong and how I fixed it
My first paper mache using flour project looked fine on top but collapsed slightly when I lifted it from the mold. The problem was not the recipe. I had used too much paste and only two thick layers, so the inside stayed wet. The fix was to let the piece dry longer, add several thin strips over the soft area, and rotate it on a rack so air could reach the underside.
If your paste feels gummy, add a little water one teaspoon at a time. If it runs off the paper, whisk in flour gradually until it coats the spoon. Large wrinkles usually mean the strip is too long or too wet. Tear it in half, smooth the center first, and overlap the edges lightly. Cracks often come from drying too quickly near a heater or sunny window. Move the project to a dry room with ordinary airflow and repair cracks with narrow strips.
A cardboard form can soften if it gets saturated. Brush or dab paste onto the paper rather than dunking every strip for several seconds. That small change keeps the structure from turning floppy.
Drying, sanding, and preparing the surface
Paper mache using flour needs patience during drying. A small project may feel dry in 12 to 24 hours, while a thick sculpture can take several days. Turn the piece occasionally so moisture does not collect underneath. Do not paint while the center still feels cool or flexible; paint can seal in dampness and cause later warping or mildew.
Once completely dry, inspect the surface in bright light. Small bumps can be sanded gently with fine-grit sandpaper, such as 220 grit. Wear a dust mask while sanding and work outdoors or over a protected surface. For larger dents, apply a thin layer of lightweight joint compound or craft filler, let it dry, and sand it smooth.
Before painting, brush away dust. Acrylic craft paint is a practical choice because it dries quickly and is easy to find. Two thin coats usually look better than one heavy coat. If you want a brighter finish, start with white acrylic primer, but test it on a hidden spot if your project includes a delicate paper form.
Easy projects and finishing ideas
A balloon makes a classic bowl: cover the lower half with plastic wrap, add layers, dry fully, then remove the balloon and trim the rim. For a wearable mask, build over a balloon or simple face-shaped form, but leave generous eye openings and avoid placing wet paper directly against skin. A cardboard tube can become a small vase cover, while old packaging can turn into a lightweight shelf decoration.
Paper mache using flour also works nicely for upcycling. Try making a patch over a damaged cardboard box, a textured frame around a thrifted mirror, or small hanging ornaments from scrap mail. Add twine, fabric scraps, buttons, or clean paper labels after the surface dries. Keep decorations light if you plan to hang them from a wall or ceiling.
For extra durability, seal the finished item with a water-based craft sealer. Remember that flour paste is not waterproof by itself. A sealed decorative piece can handle ordinary indoor use, but it should not sit outdoors or hold liquids unless you have chosen a more suitable waterproof material and coating.
A simple checklist for the next attempt
With paper mache using flour, begin with a smooth, pourable paste and torn paper strips. Cover the form lightly, overlap each strip, and alternate directions between layers. Allow real drying time before adding more paper, sanding, or painting. If the surface cracks, patch it with fresh strips instead of piling on filler. If it wrinkles, use shorter strips and less paste.
Start with a small project rather than a life-size sculpture. A bowl, ornament, or simple mask teaches you how wet the paper should feel and how long your room takes to dry materials. Once that feels comfortable, experiment with armatures, fabric texture, and thrifted household forms. The goal is not a flawless first attempt; it is learning how the material behaves so the next project feels easier.




No notes yet — write the first one.