Sewing room furniture does not need to cost a fortune or fill an entire room. A sturdy table, a supportive chair, and a storage plan can turn a spare corner into a place where mending, quilting, and upcycling feel manageable. No such thing as a stupid question here, so let’s walk through what actually helps, what often gets in the way, and how to shop secondhand without bringing home a wobbly project.
Start With the Work You Actually Do
Before looking at matching sets, write down the jobs you perform most often. Someone who alters thrifted jeans needs a clear cutting surface, an ironing spot, and easy access to a machine. A quilter may need a larger table for fabric alignment. Someone repairing hems in an apartment might prioritize a compact desk that folds or rolls away.
Measure the room, including door swings, outlets, heating vents, and the space needed to pull out a chair. A table that fits against the wall can still be frustrating if you cannot walk around it with a garment. Leave enough clearance to lift a machine, turn fabric, and open drawers fully. For many beginners, a surface about 30 inches high feels comfortable, but your chair height and body position matter more than a universal measurement.
A useful setup usually has three zones: sewing, pressing, and storage. They do not need separate pieces. A narrow cart can hold a pressing mat and iron, while a desk handles the machine. Keeping those activities close prevents the classic mistake of stacking every tool on the sewing surface until there is nowhere to place fabric.
Choosing Sewing Room Furniture on a Budget
The best sewing room furniture is often hiding in places that are not labeled for sewing. A solid wood writing desk, a dining table leaf, a library cart, or a used office workstation can become a reliable work area. Search Facebook Marketplace, Habitat for Humanity ReStore locations, estate sales, and thrift stores. Older furniture can be heavier and more stable than inexpensive flat-pack pieces, which matters when a machine vibrates during a zigzag stitch.
Inspect every secondhand piece before paying. Push down on each corner, open every drawer, and check whether the back panel is separating. Look underneath for water damage, swollen particleboard, or a strong smoke smell. A $35 desk with a damaged top can become a $100 repair after sanding, primer, and paint. On the other hand, a scratched solid wood table may need only cleaning and a coat of clear finish.
If you shop online, ask for the exact width, depth, and height rather than trusting a vague listing. Request photos of the underside and drawer tracks. A vintage desk with a drop-front compartment can be charming, but the opening may be too small for a modern machine. Measure your machine with its accessory tray attached, because that extra width is easy to forget.

Storage That Prevents Fabric Chaos
Storage should make supplies visible without making the room look like a fabric avalanche. Clear bins work well for zippers, snaps, elastic, and presser feet because small items disappear quickly in opaque boxes. For fabric, open cube shelves or labeled baskets make more sense than deep drawers where yardage becomes a compressed mystery pile.
Use one container for fabric waiting to be washed, another for active projects, and a third for scraps worth saving. This simple separation stops a half-finished jacket from being buried under cotton remnants. A rolling three-drawer cart can sit beside the machine and hold thread, scissors, and measuring tools. Choose drawers that glide smoothly; cheap plastic tracks often crack when overloaded.
Pegboards can be useful for rulers, rotary cutters, and pattern tools, but mount them where you can reach safely. Store sharp rotary blades in a closed container, especially if children or pets share the home. A narrow bookshelf can hold folded fabric and pattern boxes, while the top becomes a temporary cutting station. The most practical sewing room furniture gives every frequent tool a home within one arm’s reach.
Make the Chair Part of the Equipment
A beautiful table cannot rescue an uncomfortable chair. Look for adjustable height, a stable five-leg base, and enough support to keep you from leaning toward the needle. An office chair can work well, though bulky arms may bump the table. Armless chairs are easier to slide under a desk and often suit small rooms better.
Set the chair so your shoulders remain relaxed and your elbows stay near your sides. Your feet should rest on the floor or a firm footrest. If the table is too high, raising the chair may leave your feet dangling, so add a solid platform rather than balancing on a stack of books. Take short breaks, especially during long seam sessions. My own bad setup involved a kitchen chair and a machine placed too far back; within an hour, my neck was sore and the fabric kept dragging. Moving the machine forward and adding a footrest fixed more than buying another organizer would have.
Lighting deserves the same attention. A daylight LED task lamp with an adjustable arm can cost roughly $20 to $60 and is usually more useful than a decorative ceiling fixture. Place it to the side opposite your dominant hand so your arm does not cast a shadow across the needle.
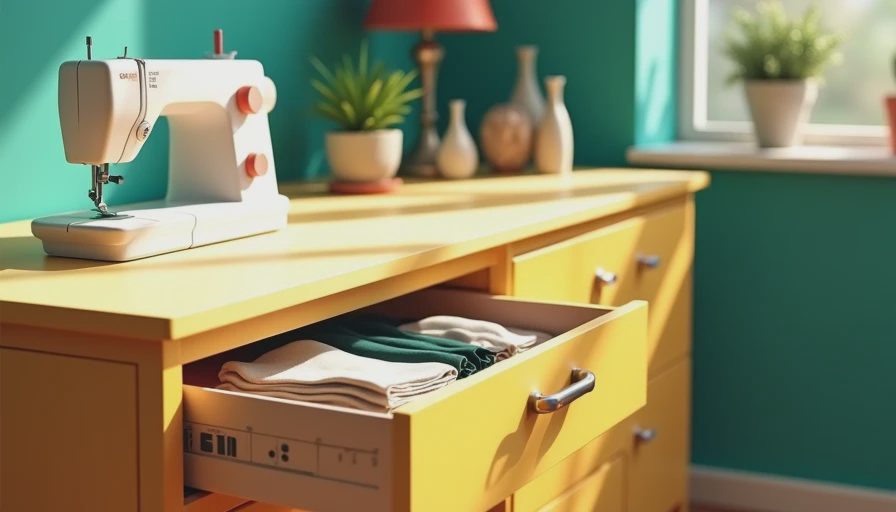
Small-Room Sewing Room Furniture Ideas
If you sew in a bedroom or living room, choose pieces that can change jobs. A drop-leaf table provides a larger surface during cutting and folds down afterward. A rolling cart can move into a closet when guests arrive. A wall-mounted folding table saves floor space, but anchor it securely into studs or use appropriate hardware for the wall type. Do not rely on adhesive strips for a surface holding a heavy machine.
A cabinet with doors can hide supplies and reduce visual clutter, but check ventilation around the machine when the doors are open. A repurposed kitchen island offers excellent cutting height, though it may be too tall for seated sewing. In that case, use it for pressing and pattern work rather than forcing one piece to do every job.
For a rented home, removable solutions are especially helpful. Over-door organizers can hold rulers and pattern paper. A tension rod inside a closet can support garment hangers or rolls of tracing paper. A folding screen can separate a creative corner from the rest of the room without drilling into walls.
Build the Space in the Right Order
Start with the machine table and chair, then test the arrangement by sewing for 20 minutes. Notice where thread, scissors, and fabric land naturally. Add storage only after you know those habits. Otherwise, it is easy to buy attractive containers that sit too far away or hold the wrong supplies.
Next, create a pressing area. A heat-resistant mat on a sturdy surface is useful, but never leave an iron unattended or place it directly on fabric. Then add task lighting and cable management. Keep cords away from the chair wheels and walking path. Finally, label only what needs labeling. Too many categories turn tidying into another project.
Sewing room furniture should support your process, not dictate a picture-perfect room. A scratched thrifted table, mismatched baskets, and one excellent lamp can outperform a coordinated set that feels cramped. Shop slowly, measure twice, and spend first on stability, comfort, and lighting. The goal is a space that makes you want to repair one more shirt instead of postponing the project until everything looks perfect.
A Practical Shopping Checklist
When comparing sewing room furniture, bring your machine measurements, a tape measure, and a quick list of must-have features. Confirm that the work surface is stable, the height suits your chair, and the piece can enter through your doorway. Check drawers for snagging hardware and shelves for sagging. If a used item needs paint, repairs, and new hardware, add those costs before comparing it with a new option.
A realistic starter budget might be $40 to $150 for a used table, $50 to $180 for a supportive chair, and $20 to $60 for lighting. Storage can begin with repurposed jars, baskets, and boxes before you buy matching containers. When the layout works, upgrade one weak point at a time. That approach keeps money available for the supplies that make your actual projects better: sharp scissors, dependable thread, replacement needles, and fabric you are excited to transform.

No notes yet — write the first one.