
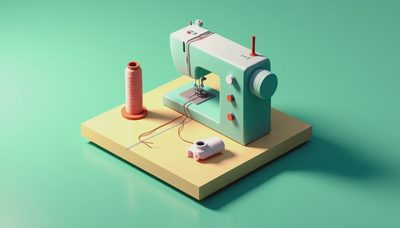
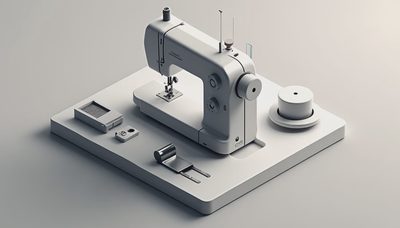
So you’ve got a sewing machine, a spool of thread, and a little metal or plastic bobbin—and now you're staring at it thinking, *how do I thread the bobbin?* No such thing as a stupid question here. This is the step that trips up almost every new sewist. But once you get the hang of it, it becomes second nature. Let’s walk through it together, with real steps and a few tips I learned the hard way.
What You’ll Need
Before we start, gather these items:
- Your sewing machine (I’ll reference common brands like Brother, Singer, and Janome)
- A bobbin that matches your machine (check your manual—bobbins aren’t all the same size)
- A spool of thread (use the same thread for bobbin and top for best results)
- Scissors
- Your machine’s manual (if you kept it—if not, a PDF is usually online)
**Pro tip:** *Always wind the bobbin with the same thread you’ll use on top.* Mixing threads can cause tension issues.

Step 1: Winding the Bobbin
The first part of “how do I thread the bobbin?” is actually winding it. Most modern machines have a built-in bobbin winder.
- **Place the thread spool** on the spool pin. Pull the thread to the left, around the tension disc (usually near the top of the machine). This ensures even winding.
- **Insert the thread** through one of the small holes on the bobbin, from the inside out.
- **Place the bobbin** on the bobbin winder spindle and push it to the right (or engage the winding mechanism—some machines have a lever).
- **Hold the thread tail** and start the machine slowly. It will wind the thread onto the bobbin evenly. Stop when the bobbin is about 80% full—overfilling can cause tangles.
- **Cut the thread**, disengage the winder, and remove the bobbin.
**What can go wrong:** If the winding is uneven, the tension disc might need a clean. Also, cheap thread can leave lint. Stick with brands like Güttermann or Coats & Clark.
Step 2: Inserting the Bobbin into the Machine
Now that your bobbin is wound, you need to put it in the machine. This depends on whether you have a top-loading (drop-in) or front-loading bobbin case.
Top-Loading Bobbin Systems (most common on newer Brother and Janome machines)
- Open the slide plate (usually a clear plastic cover right under the needle).
- Drop the bobbin in so the thread runs counterclockwise (most machines—check your manual).
- Pull the thread through the slot and under the tension spring. You should feel a slight tug.
- Leave a tail about 4 inches long.
Front-Loading Bobbin Systems (common on older Singers and some industrial models)
- Remove the bobbin case from the machine (pull the latch).
- Place the bobbin inside, thread running clockwise (again, check manual).
- Pull the thread through the slot and under the tension spring.
- Holding the latch, insert the bobbin case back into the machine until it clicks.
**Important:** *Always turn the handwheel toward you* when checking the needle position—turning it away can jam the machine.

Step 3: Bringing the Bobbin Thread Up
After inserting, you need to bring the bobbin thread to the surface.
- Hold the top thread with your left hand.
- Turn the handwheel toward you one full rotation.
- As the needle goes down and comes back up, it catches the bobbin thread.
- Gently pull the top thread; a loop of bobbin thread should pop up.
- Pull both threads under the presser foot and toward the back.
**Why this matters:** If you don’t bring the bobbin thread up, your first stitches will be a tangled mess. I’ve skipped this step more times than I’ll admit.
Common Mistakes and How to Fix Them
- **Bobbin thread bunching underneath:** Usually means the bobbin is inserted wrong or the tension is off. Re-check the threading direction. Also clean lint from the bobbin area.
- **Top thread breaks:** Could be a burr on the needle plate. Swap to a new needle and check tension.
- **Machine makes a grinding noise:** The bobbin might be too full or not seated correctly. Remove and reinsert.
- **Skipped stitches:** Try a fresh needle and make sure the bobbin is wound evenly.
**Quick fix for tension issues:** Most home machines have a small screw on the bobbin case. Turn it a tiny bit (no more than a quarter turn) clockwise to tighten, counterclockwise to loosen. Test on scrap fabric.
Different Bobbin Types: Plastic vs. Metal
| Bobbin Type | Pros | Cons |
|-------------|------|------|
| Plastic | Lightweight, inexpensive, won’t rust | Can warp in hot conditions |
| Metal | Sturdy, better tension, long-lasting | Can rust if stored damp; heavier |
Check your manual for the correct type. Using the wrong bobbin can damage your machine. Most modern machines use plastic bobbins, but vintage machines often require metal. If you’re not sure, bring your bobbin to a sewing shop and match it.
Still Stuck? Try These Resources
- **YouTube:** Search “[your machine model] bobbin winding” for visual guides.
- **Your machine’s manual:** PDFs are available on manufacturer sites.
- **Facebook sewing groups:** Reddit r/sewing and Discord communities are great for live help.
**Final encouragement:** You’ve got this. Everyone has messed up a bobbin—I’ve eaten my share of thread tangles. The key is patience and practice. Now go make something awesome.
*Need more help? Check out our machine comparison guides and dye tutorials for your next upcycle project.*


No notes yet — write the first one.