
If you've ever picked up a gorgeous thrifted dress that didn't quite fit or felt dated, you're not alone. Using a clothing patterns dress can be the key to turning that find into something you love. No such thing as a stupid question here — let's walk through how to choose and use patterns for dress transformations. Whether you're a total beginner or have some sewing experience, this guide will help you confidently alter thrift store dresses. Thrifting is full of hidden gems, but sometimes the perfect silhouette hides under a bad hem or loose waist. A clothing patterns dress project lets you reshape those pieces into custom favorites.
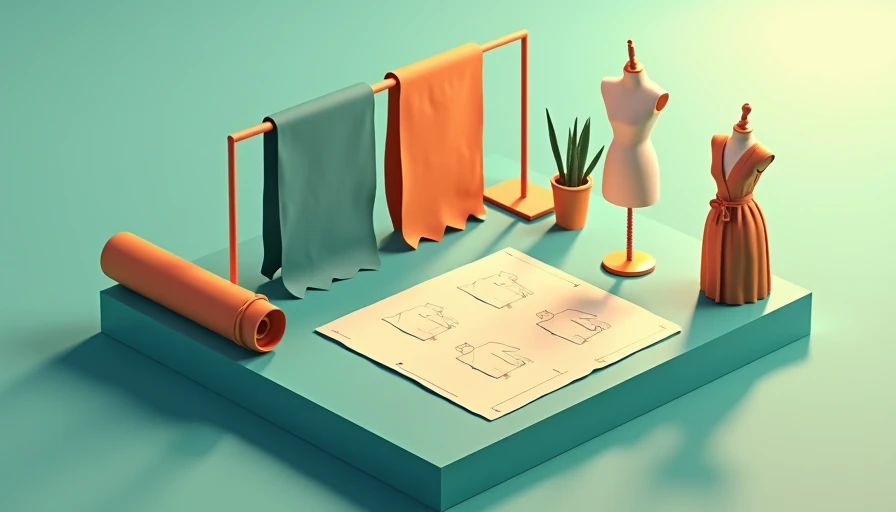
What Are Clothing Patterns for Dresses?
A clothing patterns dress template is a set of paper pieces that guide your cuts and seams. For upcyclers, these templates help reshape an existing garment without starting from scratch. When you think of a clothing patterns dress project, you're essentially using a pre-designed silhouette to alter the fit or style of a thrifted piece. Many vintage patterns are available at thrift stores themselves — another fun layer to the hunt. Start with a simple pattern, like a basic sheath or A-line, and see how it transforms your wardrobe. Patterns come in different sizes and eras, so take your measurements and choose one that matches your fabric type. Cotton, linen, and stable knits are beginner-friendly. The beauty of using a clothing patterns dress approach is that you can mix old and new — a 1970s pattern on a 1990s dress creates something totally unique.
Choosing the Right Pattern for Your Thrifted Dress
Not every pattern works for every dress. Consider the fabric weight, stretch, and original cut. For beginners, look for patterns labeled "easy" or "beginner." A simple shift dress pattern can turn a shapeless sack into a fitted favorite. Remember, a clothing patterns dress approach works best when you match pattern complexity to your skill level. If you're new, avoid patterns with complicated darts or fitted sleeves. Start with something like adding a waist seam or changing the neckline. Thrift store patterns are cheap — grab a few to experiment. Pay attention to the pattern's suggested fabric types: if your dress is stretchy, use a pattern designed for knits. Also, check the original dress's seams — you can often repurpose existing construction details (like zippers or linings) to save time. A good rule: the more seams the original dress has, the easier it is to reshape with a pattern. A clothing patterns dress project that uses existing seams often looks more professional with less work.
Step-by-Step: Using a Clothing Pattern to Alter a Dress
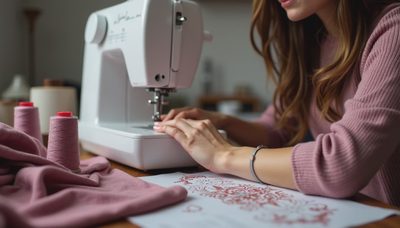
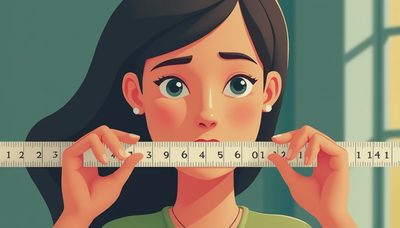
Let's walk through the process with a real example. First, choose your pattern and take your dress's measurements — bust, waist, hips, and length. Pin the pattern pieces to the dress, aligning the grain lines with the original fabric grain. Cut carefully, leaving a 5/8-inch seam allowance. Sew along the new lines, trying on as you go. "Here's what went wrong + how I fixed it": when I first tried a clothing patterns dress alteration, I forgot to account for seam allowances and ended up with a too-tight dress. Always add 5/8 inch, and use a seam ripper if needed — no shame in redoing. Another tip: start with a temporary basting stitch to test the fit before committing to a final seam. This technique works for A-lines, fit-and-flares, and more. For sleeves, you might need to adjust the armhole curve; pattern instructions usually guide this. Practice on a thrifted dress you don't love first to build confidence. A clothing patterns dress project becomes easier with each try.

Common Mistakes and How to Avoid Them
Beginners often skip pre-washing or use the wrong needle type. For a clothing patterns dress project, pre-wash your thrifted dress to prevent shrinkage after altering. Also, check that pattern pieces are placed on the correct fabric side — wrong side up ruins the look. Another trap: ignoring pattern fabric recommendations. If your dress is knit, use a pattern designed for knits, or your stitches may pucker. No such thing as a stupid question — drop a comment if you're stuck. Taking your time here saves frustration later. Many new sewists also misplace grain lines; recheck before cutting. Finally, don't rush the pinning step — pin perpendicular to the edge to keep fabric flat. A clothing patterns dress alteration that is well-pinned cuts more accurately. If you make a mistake, remember: every seam ripper pull teaches you something. Our community loves sharing fixes, so don't hesitate to ask on our forums.
Tools You'll Need for Dress Pattern Projects
You don't need a pro studio. Essentials: sewing machine (any basic model works), sharp fabric scissors, pins, measuring tape, and your chosen pattern. A seam ripper is crucial for fixes. For a clothing patterns dress upcycle, also have a marking tool (chalk or water-soluble pen). Test stitches on a scrap first. We recommend starting with patterns from Simplicity or McCall's, but thrifted patterns are great too. The key is patience — enjoy the transformation. With practice, you'll be able to upcycle any thrifted dress into a custom piece. Consider adding a tailoring ham for pressing curved seams, but not essential. If you're on a budget, a thrifted sewing machine under $50 can handle most alterations. A clothing patterns dress project doesn't require expensive gear — just time and curiosity. Our tool guides at StitchSwapTalk break down what's worth buying and what you can skip. Happy sewing!


No notes yet — write the first one.