
No such thing as a stupid question here — let's walk through it. If you've ever stared at your sewing machine wondering how to insert bobbin sewing machine correctly, you're not alone. Getting the bobbin in right is the foundation for smooth stitching, and it's one of the first skills every sewist should master. In this guide, we'll cover both top-loading and front-loading machines, common mistakes, and how to fix them. By the end, you'll be threading that bobbin case like a pro.
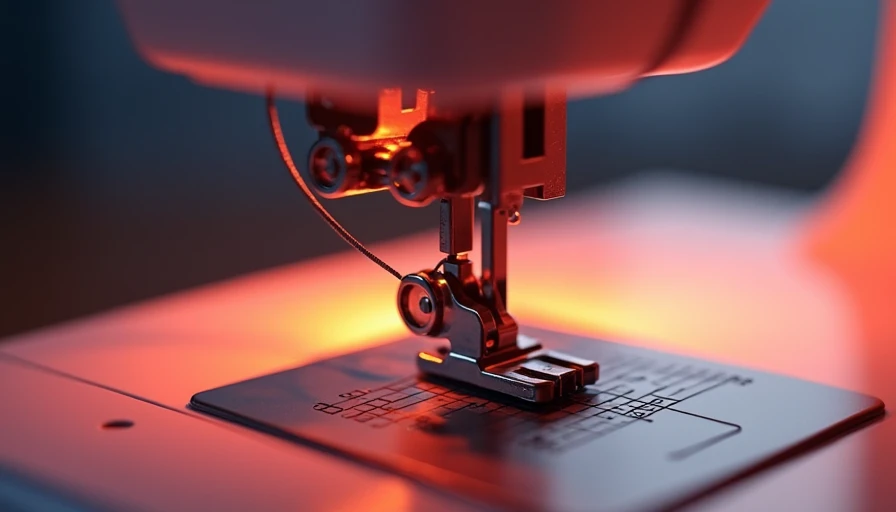
Understanding Your Bobbin Type: Top-Loading vs. Front-Loading
Before you learn how to insert bobbin sewing machine, you need to know which type your machine uses. Drop-in (top-loading) bobbins sit in a compartment on the top of the machine, under the needle plate. You simply drop the bobbin in and pull the thread through a slot. Front-loading bobbins go into a removable case that fits into a vertical slot in the front of the machine. To insert bobbin sewing machine of the front-loading type, you'll need to hold the case correctly and guide the thread through the tension spring.
Most modern home machines use top-loading bobbins because they're easier to see and swap. Vintage machines (think old Singers) often use front-loading setups. If you're thrifting or upcycling a vintage machine, check the manual — or look for a small door on the front. Either way, understanding your machine is step one.

Step-by-Step: How to Insert a Bobbin in a Top-Loading Machine
Let's start with the easier one. To insert bobbin sewing machine with a top-loading system, follow these steps:
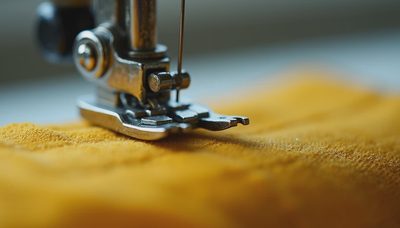
- **Remove the needle plate** — Usually held by two screws or a release latch. Lift it off to reveal the bobbin compartment.
- **Place the bobbin in** — Make sure the thread unwinds in the correct direction (counterclockwise or clockwise — check your manual).
- **Pull the thread through the slot** — Most drop-in bobbins have a small channel to guide the thread to the tension spring.
- **Bring the thread under the tension spring** — You'll feel a slight resistance.
- **Trim the tail** — Leave about 4 inches of thread sticking out.
- **Replace the needle plate** and you're ready to thread the upper thread.
If you're learning how to insert bobbin sewing machine for the first time, this is the most forgiving method. You can see exactly where the thread goes, and there's no bobbin case to fumble with.
Step-by-Step: How to Insert a Bobbin in a Front-Loading Machine
Front-loading machines require a little more patience, but once you know how to insert bobbin sewing machine with a case, it's second nature. Here's the process:
- **Take out the bobbin case** — Open the front door (usually below the needle), and pull the metal case out by its lever.
- **Open the case** — Push the latch to open the hinged cover.
- **Insert the bobbin** — Drop it in so the thread unwinds clockwise when you pull it (this is the most common orientation — check your manual).
- **Pull the thread through the slot** — Guide it into the tension spring slit.
- **Test the tension** — Gently pull the thread; it should feel snug but not tight.
- **Close the case cover** — Make sure the bobbin doesn't fall out.
- **Insert the case** — Hold it by the lever and slide it into the machine until it clicks.
To insert bobbin sewing machine correctly with a front-loader, always check that the case is seated fully. If it's loose, the bobbin won't feed properly, and you'll get tangled threads.
Common Bobbin Problems and How to Fix Them
Even after you learn how to insert bobbin sewing machine, things can go wrong. Here are the most common issues and how to solve them:
- **Bobbin thread bunching underneath** — Often caused by incorrect threading. Remove the bobbin and reinsert it, making sure the thread is in the tension spring. Also check that the upper thread is properly threaded.
- **Bobbin won't catch** — The upper thread may not have caught the bobbin thread. Hold the upper thread tail and turn the handwheel toward you a full rotation; you should see the bobbin thread loop up.
- **Bobbin tension too loose or too tight** — Most front-loading cases have a small screw on the side to adjust tension. Only turn it a quarter turn at a time. For top-loading, tension is often fixed — if it's off, the bobbin might be wound unevenly.
- **Bobbin jams or makes grinding noise** — Stop immediately. Check for lint or thread bits in the bobbin area. Use a small brush (a clean makeup brush works great) to clean it out.
Remember, no such thing as a stupid question here. If you're stuck, take a photo of your setup and ask in the comments or in our community forum. We've all been there.
Tools and Supplies You'll Need for Smooth Bobbin Winding
You don't need much to insert bobbin sewing machine easily, but a few tools help:
- **Correct bobbin size** — Not all bobbins are the same. Class 15 (for most modern machines) and Class 66 (for some older ones) are common. Check your manual. Using the wrong size can cause tension issues.
- **Good quality thread** — Cheap thread produces lint that clogs the bobbin area. Use all-purpose polyester thread (e.g., Gütermann or Coats & Clark) for most projects.
- **Small brush** — For cleaning lint from the bobbin housing after every few projects.
- **Screwdriver** — To adjust tension on front-loading cases if needed.
- **Patience** — If you're learning how to insert bobbin sewing machine, give yourself time. Practice on scrap fabric first.
That's it. Now you know how to insert bobbin sewing machine like a seasoned thrifter. Next time you pick up a vintage Singer or a modern Brother, you'll feel confident threading that bobbin. Share your wins and your tricky moments — we're all learning together.


No notes yet — write the first one.