Cotton double gauze fabric looks delicate, but it is far more useful than its airy appearance suggests. Made from two lightweight gauze layers tacked together at small intervals, it feels soft, breathable, and slightly crinkled. That makes it a favorite for relaxed tops, baby clothing, scarves, blankets, and comfortable secondhand-inspired projects. No such thing as a stupid question here — let’s walk through what it is, how to handle it, and where beginners usually get into trouble.
What makes double gauze different?
Regular gauze is usually a single loose layer. Cotton double gauze fabric has two layers joined during manufacturing, so it provides more coverage and body without becoming heavy. The layers can shift a little, which is the main difference you will notice while sewing. It is not as stable as quilting cotton, canvas, or most crisp shirting fabrics.
The surface often has a soft puckered texture. Some versions are nearly smooth when pressed, while others keep a noticeable crinkle. That texture is part of the charm, especially for upcycled clothing where a perfectly polished finish is not the goal. It also hides small wrinkles and gives simple garments a casual, lived-in look.
You will commonly find it in 100 percent cotton, although fabric shops also sell blends and printed versions. Solid colors are easiest for a first project because you can focus on handling the fabric instead of matching a complicated design. Yardage often costs around $10 to $20 per yard, while premium prints and organic options can cost more.
How to choose a good piece
When shopping in person, hold the fabric up to a light source. Cotton double gauze fabric should look airy, but the two layers should not separate dramatically when you gently pull at an edge. Check for thin spots, snags, and loose threads, particularly along a thrifted remnant’s cut ends. A small flaw can be avoided in a pattern, but a weak section running through the whole piece is not worth fighting.
Scrunch a corner in your hand and release it. A soft recovery and even texture are good signs. If the fabric feels stiff, papery, or unusually slippery, it may contain a synthetic blend or have a heavy finish. That is not automatically bad, but it will behave differently from soft cotton and can be frustrating for a first garment.
For upcycling, look beyond fabric-store yardage. Oversized cotton scarves, unused receiving blankets, wide skirts, and roomy summer shirts can provide surprisingly large pieces. Inspect seams before cutting. A secondhand item may have faded areas, deodorant marks, or needle holes that were invisible on the hanger.
Prepare it before cutting
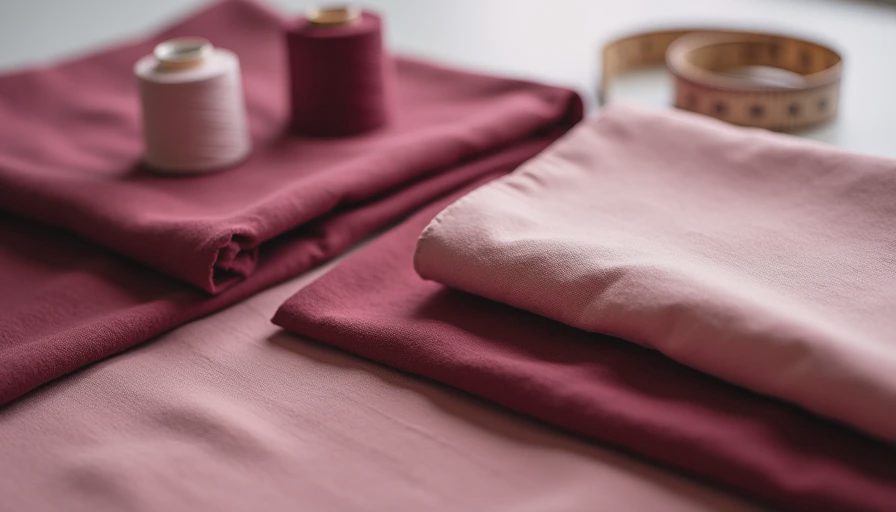
Prewashing is not optional for this fabric. Cotton can shrink, and the two gauze layers may tighten unevenly during the first wash. Wash it in warm water with a mild detergent, then tumble dry on low or air-dry it in the same way you expect to care for the finished item. If you skip this step, a carefully fitted top can become noticeably smaller after its first laundry day.
Do not stretch the fabric while it is wet. Lift it with both hands, press out excess water gently, and lay it flat or hang it without pulling. Once dry, press with a warm iron only if needed. Many sewists prefer to keep the crinkle because aggressive pressing can make the finished piece look flatter than intended.
Before cutting, place the fabric on a large table or clean floor. Use pattern weights instead of relying only on pins; soup cans wrapped in clean fabric can work in a pinch. A rotary cutter and fresh blade are helpful, but sharp fabric scissors are perfectly adequate. Smooth the surface lightly rather than tugging it into shape.
Sewing cotton double gauze without frustration
Cotton double gauze fabric benefits from a fresh, fine needle. A universal size 70/10 or 80/12 is a sensible starting point, and a slightly shorter stitch length around 2.5 millimeters usually gives a neat seam. Test on scraps first because some machines feed the layers unevenly. If the fabric bunches under the presser foot, use a new needle and reduce pressure on the material.
A walking foot can help, especially on long seams, but it is not essential. Place tissue paper or lightweight tear-away stabilizer under a troublesome seam, stitch through it, and gently remove it afterward. Another simple fix is to use more pins than usual, positioned perpendicular to the seam so they are easy to remove as you sew.
French seams work beautifully for lightweight tops, scarves, and children’s garments because they enclose the raw edges. For a basic French seam, sew the first seam with the wrong sides together using a narrow allowance. Trim the allowance, press it to one side, fold right sides together, and stitch again to trap the raw edge. The result is tidy and comfortable against skin.
Beginner projects that suit the fabric
A gathered skirt is a friendly first project because the design does not depend on exact tailoring. You can also make a loose elastic-waist pant, simple robe, oversized pull-on top, baby blanket, or neck scarf. These projects use the fabric’s softness rather than asking it to hold a sharp crease or structured shape.
Cotton double gauze fabric is less suitable for tailored blazers, fitted corsets, crisp collars, or projects that require strong shape. It can support a waistband when reinforced with interfacing, but it should not be expected to behave like denim or poplin. If you want a more structured result, combine it with stable fabric for facings, pockets, or yokes.
For a thrift flip, start with an oversized shirt. Remove the sleeves, trim the side seams, and use the existing hem when possible. Add elastic or a drawstring at the waist for an easy summer dress or tunic. Before cutting, mark stains and worn areas with safety pins so you do not accidentally place them at the center front.

Washing, repairs, and honest fixes
Finished pieces should usually be washed on a gentle or normal cycle with like colors and dried on low heat. High heat can encourage additional shrinkage and make the crinkle more pronounced. If a seam starts opening, do not pull the loose threads. Secure the area with a short line of backstitching, trim the thread tails, and reinforce the nearby seam if the fabric looks strained.
Here’s what went wrong + how I fixed it: a double-gauze seam once puckered because the fabric was stretched while sewing. Unpicking every stitch made the holes worse, so the better repair was to trim the uneven section, stabilize it with a narrow strip of lightweight interfacing, and restitch with a walking foot. The fix was visible up close, but the garment became wearable instead of joining the scrap pile.
If a raw edge frays heavily, finish it with a zigzag stitch, overlocker, or French seam. Avoid repeatedly trimming the edge, since every cut removes useful fabric and can make the problem travel farther into the project. Small imperfections are normal with loose-weave cloth; thoughtful construction matters more than making every surface look factory-perfect.
Is it worth buying?
For comfortable everyday clothing, the answer is usually yes. Cotton double gauze fabric is breathable, approachable, and forgiving once you understand its movement. It is especially rewarding for beginners who want a project that feels wearable rather than stiff or overly formal.
Buy enough extra yardage for shrinkage and pattern placement, particularly when working with a directional print. A half-yard remnant can make a scarf or pocket set, while two to three yards may cover a loose adult top depending on the pattern and size. Compare the cost with thrifted blankets and oversized garments before committing to a full bolt.
Start with a small item, test your machine settings, and keep the scraps for patches or practice seams. The first attempt might not be perfectly straight, and that is fine. The point is to learn how the layers respond, then use that knowledge on the next transformation. Share your result with the StitchSwapTalk community; practical fixes are always more useful than pretending a project went perfectly.



No notes yet — write the first one.