Tracing paper for fabric patterns is one of those simple sewing supplies that can make a thrift flip feel much less intimidating. It lets you copy a commercial pattern, preserve an original template, trace a favorite garment, or make a small adjustment without cutting up the only version you have. No such thing as a stupid question here — let's walk through it.
If you are working with a vintage pattern, a PDF pattern, or a shirt you want to recreate, the right paper saves time and prevents permanent mistakes. You do not need a large cutting table or an expensive drafting setup. A ruler, a sharp pencil, and a little patience are enough for many beginner projects.
What tracing paper for fabric patterns actually does
Tracing paper creates a temporary working copy between your pattern and your fabric. Depending on the type you buy, you can place it over printed lines, transfer markings with a tracing wheel, or draw a new shape directly onto a translucent sheet. The key benefit is flexibility: you can alter the copy while leaving the original pattern untouched.
For most clothing projects, look for paper that is lightweight but not tissue-thin. Swedish tracing paper, medical exam table paper, pattern paper rolls, and large sheets of vellum are common choices. Swedish tracing paper is especially useful because it can be sewn over for fitting and tends to resist tearing better than ordinary gift tissue.
Avoid standard printer paper for full-size pieces. It is easy to find, but it does not drape well, it cracks at folds, and it becomes awkward around curved seams. Wax paper is also a poor substitute for long-term pattern work because it can stretch, slide, and transfer residue when heated.

Choosing the right material for your project
Tracing paper for fabric patterns should match the job, not just the budget. For copying a small pocket, collar, or patch shape, inexpensive translucent art paper can work perfectly. For a full skirt, jacket, or pair of pants, buy a roll of pattern paper so you are not joining several small sheets with tape.
Here is what belongs and what does not:
- Swedish tracing paper belongs in a fitting project because it is durable and slightly flexible.
- Dotted pattern paper belongs in drafting work because the grid helps with straight lines and measurements.
- Parchment paper belongs near baking supplies, not near a hot iron or a serious pattern alteration.
- Tissue paper belongs in a pinch for temporary tracing, but reinforce it before repeated handling.
- Clear plastic pattern film belongs in your toolkit when you want a reusable template for bags, quilting, or repeated alterations.
A 10-yard roll of tracing material often costs more than a small pad, but the wider format can prevent frustrating seams between sheets. If you are copying thrifted clothing, choose a translucent material that lets you see both the garment edge and important construction details such as darts, pleats, and seam intersections.
How to trace a pattern step by step
Start by pressing the original paper flat. A curled vintage pattern can shift enough to distort a sleeve or side seam. Use low heat if the paper is delicate, and place a clean cloth between the iron and the pattern when needed.
Lay tracing paper over the piece and secure it with pattern weights, low-tack tape, or a few pins placed outside the cutting line. Do not stretch the sheet as you attach it. A stretched copy can shrink back later and change the finished garment measurements.
Trace every cutting line, grainline, fold line, dart, notch, button placement, and piece number. Add the seam allowance separately if the original pattern does not include it. Write the size, fabric direction, and number of pieces directly on the copy. This feels fussy until you have six similar-looking bodice pieces on the floor.
For a garment you already own, trace one side first, then flip the clothing to capture the opposite side if the design is symmetrical. Mark where the hem folds, where the sleeve joins the body, and whether the seam is finished with binding, a serger, or a simple zigzag stitch. Those details help you reproduce the fit rather than only the outline.
Fixing common tracing mistakes
The most common mistake is copying the outside edge while missing the seam line. Here's what went wrong + how I fixed it: the first time I copied a thrifted blouse, I followed the garment edge and forgot that the seam allowance was hidden inside the finished shape. The result was a blouse several inches too small. Now I mark both the finished edge and the likely seam line before cutting anything.
Another problem is a crooked grainline. Place a ruler along the center front, center back, or a known straight woven thread, then transfer that direction to the new piece. A pattern can have a beautiful outline and still twist on the body if the grainline is off.
Small gaps at taped joins are easy to miss. Hold the copy up to a window or light-colored wall and inspect every connection. If a line does not meet cleanly, redraw it with a ruler or French curve. Do not trust a jagged tape edge to guide your scissors.
When an adjustment is needed, use the slash-and-spread method on the paper copy. Cut along the adjustment line, spread or overlap the sections, and tape them in place. For a waist adjustment, redraw the side seam smoothly instead of leaving a sharp corner that will transfer into the fabric.
Testing the pattern before cutting good fabric
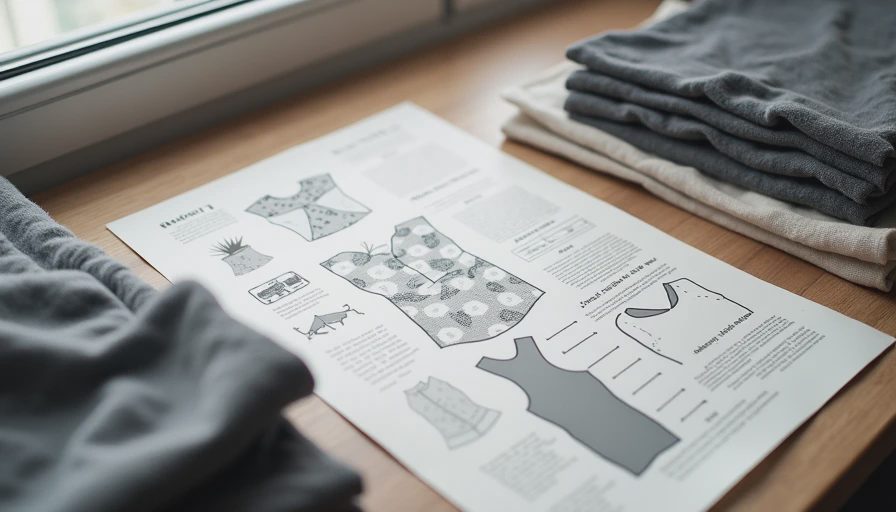
Tracing paper for fabric patterns makes testing much cheaper because you can modify the template before using your best material. For a fitted top, make a quick muslin from an old sheet or an inexpensive cotton remnant. For a loose jacket, you might only need to test the shoulder, armhole, and sleeve connection.
Cut the test fabric with generous seam allowances where possible. Baste the main seams using a long stitch, then try on the garment over the clothing you expect to wear underneath. Mark tight areas with chalk, safety pins, or washable pen. Transfer those changes back to the paper rather than guessing at the sewing machine.
Pay attention to movement, not just standing appearance. Raise your arms, sit down, bend forward, and walk. A vintage garment may look perfect on a hanger but need extra room across the back or at the hip. Those observations are especially useful when copying clothing from a different era or turning menswear into a new silhouette.
Before cutting final fabric, compare the finished pattern pieces with your measurements. Remember that ease is intentional extra room, while a mismatch caused by a tracing error is not. A flexible paper copy helps you see the difference and make a clean correction.
Storing and reusing your copies
Label every piece with the project name, date, size, fabric direction, and alteration notes. Store small pieces in a large envelope and hang oversized pieces from a pants hanger or roll them loosely. Sharp folds can become permanent, especially in thin tracing sheets.
Tracing paper for fabric patterns lasts longer when you keep it away from damp floors, direct sunlight, and heavy objects. If a corner tears, reinforce the back with clear tape before the rip reaches a notch or seam line. For heavily used pieces, transfer the final version to sturdier pattern paper or clear plastic film.
Keep your first draft instead of throwing it away immediately. It records what changed and can help when you make a second version. A thrifted denim shirt might become a cropped jacket now and a vest later; the original copy gives you a reliable starting point for both.
The best setup is not the fanciest one. A stable table, good lighting, a sharp pencil, a flexible ruler, and tracing paper for fabric patterns will handle a surprising number of sewing and upcycling projects. Start with a simple pocket or loose shirt, test your lines, and build confidence one careful copy at a time.




No notes yet — write the first one.