Twin needle sewing is one of those techniques that looks intimidating until you see what the machine is actually doing. Two needles stitch parallel lines on the top of your fabric while the bobbin thread creates a zigzag underneath. That combination gives knit hems enough flexibility to stretch without immediately popping open. It is especially useful when upcycling thrifted T-shirts, sweatshirts, leggings, jersey dresses, and other stretchy finds.
No such thing as a stupid question here, so let’s walk through it. You do not need an expensive machine or a specialty coverstitch machine. A standard home sewing machine with a zigzag-capable bobbin system can usually handle the job. The important parts are choosing the right twin needle, threading carefully, testing on scraps, and lowering your expectations slightly when working with very thick or unstable fabric.
What twin needle sewing actually does
A twin needle is a single shank holding two needles side by side. From above, the machine makes two straight rows of stitching. Underneath, the bobbin thread moves from side to side between those needle penetrations, creating a narrow zigzag. That hidden zigzag is what lets a hem stretch more than two ordinary straight stitches would.
Twin needle sewing is not the same as using a coverstitch machine. A coverstitch is designed specifically for professional-looking knit hems and usually has more looper control. A twin needle is a practical home-sewing shortcut. It can produce a clean result, but the finish may look slightly different from ready-to-wear clothing, particularly on lightweight fabric.
The technique works best on hems that are already folded and stabilized. It is not a magic fix for a wavy, stretched-out shirt edge. If the fabric has been pulled while cutting or pressing, the twin lines will faithfully sew that waviness into place.
Choosing the right needle and thread
Start with a twin needle labeled stretch or jersey when sewing knits. A stretch twin needle has a rounded point that is less likely to damage elastic fibers. For woven cotton, linen, or denim, a universal or jeans twin needle can be more suitable. The package usually lists the needle spacing, such as 2.5 millimeters, 3 millimeters, or 4 millimeters.
A narrow 2.5-millimeter needle is a friendly starting point for T-shirt hems. It leaves a subtle double line and places less stress on lightweight material. A 4-millimeter version creates a more visible decorative finish, but the wider stitch can be harder to manage near curves. Avoid placing the needles so close to the folded edge that one needle misses the fabric.
Use regular all-purpose polyester thread in both upper positions and in the bobbin unless your machine manual says otherwise. Polyester has useful give and is generally more forgiving than cotton thread for stretchy garments. You will need a second spool or a small thread stand. If your machine has only one spool pin, place the extra spool in a mug, jar, or thread holder beside the machine so it can feed smoothly.
Setting up your machine without guesswork
Before installing the needle, turn off the machine. Raise the presser foot, remove the single needle, and insert the twin needle with its flat side facing the direction specified by your manual. Most household machines use the same flat-side orientation as a regular needle, but checking the manual prevents a frustrating collision with the bobbin case.
Thread both upper threads through the normal guides together until you reach the needle area. Then separate them, passing one thread through each needle eye. Keep the two threads from crossing around the needle bar. Wind and insert the bobbin as usual, and pull both needle threads and the bobbin thread under the presser foot before beginning.
Select a straight stitch unless your manual recommends another setting. Set the stitch length around 2.5 to 3 millimeters for a typical knit hem. Turn off automatic needle positioning if it moves the needle sideways, and never use a zigzag width with a twin needle unless the machine specifically supports that combination. The needles can strike the presser foot and break.
Twin needle sewing on a thrifted T-shirt
Here is a reliable process for twin needle sewing on a secondhand shirt. First, wash and dry the garment the way you normally will. Second, mark the new hem with tailor’s chalk or a washable pen. Third, trim away a stretched or uneven old hem, then press the raw edge under by about half an inch.
Use a warm iron and a pressing cloth when the fabric is delicate. You can also add a narrow strip of knit interfacing inside the fold if the edge keeps rolling. Do not stretch the fabric while pressing. The goal is a flat fold, not a permanently elongated one.
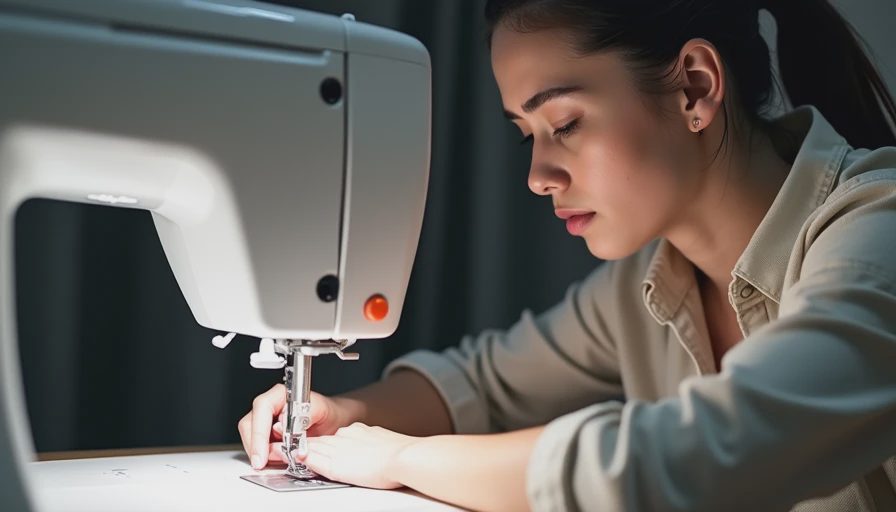
Place the garment right side up and sew from the outside so the parallel lines are visible. Keep the inner needle roughly one-eighth to one-quarter inch from the folded edge. Guide the fabric gently rather than pulling it toward you. Sew slowly around the hem, stopping with the needles down whenever you need to reposition the shirt.
If possible, use a scrap cut from the garment to test first. A five-minute test can reveal a tension problem before it becomes a full row of holes in a vintage tee.

Fixing skipped stitches, tunneling, and popped hems
Skipped stitches are usually caused by the wrong needle type, a blunt needle, incorrect threading, or fabric that is stretching away from the presser foot. Replace the needle with a fresh stretch twin needle, confirm that both upper threads are seated in the tension discs, and try a scrap without pulling it. A strip of tissue paper under the fabric can help very soft knits feed more evenly; tear it away carefully afterward.
If the fabric forms a raised ridge between the two stitch lines, you are seeing tunneling. Lowering the upper thread tension slightly can help, but test in small adjustments rather than turning the dial dramatically. Stabilizer or lightweight knit interfacing under the hem can also flatten the result.
A hem that pops when stretched may have a stitch length that is too short, a needle designed for wovens, or insufficient thread tension balance. Test the finished sample by stretching it as much as the garment will normally stretch. If threads snap during a gentle test, fix the settings before sewing the actual piece.
When this technique is worth using
Twin needle sewing is a smart choice for casual upcycling projects where you want a durable, familiar-looking hem without investing in another machine. It works nicely on cotton jersey, rib knit, interlock, lightweight sweatshirt fleece, and many athletic fabrics. It also creates attractive parallel lines on woven pockets, linen hems, and decorative seams.
It is less convenient on thick denim, bulky sweatshirt side seams, very slippery rayon jersey, or garments with tight curves. The machine may struggle when several folded layers pass under the foot. In those cases, a regular zigzag, stretch stitch, or professional coverstitch can be a better solution.
Think about the garment’s original construction too. If a vintage top has a narrow rolled hem, copying it with a twin needle may look out of place. Matching the original thread color and choosing a conservative needle spacing often makes the alteration appear intentional instead of obviously homemade.
A simple final test before wearing the garment
After finishing, trim the thread tails and press the hem from the wrong side. Do not iron directly over raised stitches with heavy pressure. Stretch the hem gently in several directions, inspect both sides, and look for loose loops or skipped sections. If one area looks weak, remove only that section and resew it rather than ripping out the entire hem.
Wash the garment once before judging the final result. Some knits relax after laundering, and a hem that looks perfectly flat at the machine can become wavy later. If that happens, press it again with a cloth and consider adding stabilizer to the next project.
The best twin needle sewing results come from patience, not speed. Start with a scrap, use a fresh stretch needle, and let the machine feed the fabric. Once you have successfully hemmed one thrifted T-shirt, the technique becomes a useful little upgrade for dresses, sleeves, tanks, and handmade knit projects.


No notes yet — write the first one.